BitBarでMacメニューバーに好きな文字列を表示する
BitBarというアプリを使ってMacのメニューバーに文字を表示してみました。

まずは公式サイトからBitBarをインストールします。
起動するとプラグインのフォルダーを求められるので、好きな場所を指定します。

次にプラグインフォルダの中にスクリプトを追加します。
test.shというファイルを作って下のように記述します。
#!/bin/bash

echo "HelloWorld"
これでメニューバーのBitBarのRefresh Allを使えば先程の処理が反映されます。
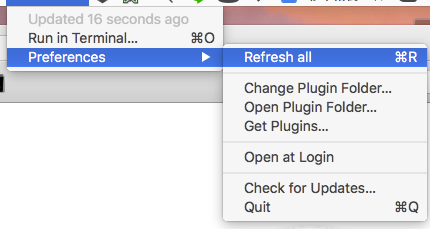
プラグインはShellだけでなくRubyで書く事も可能です。
#! /usr/bin/env ruby

p 'HelloRuby'

複数行の出力は、下のような表示になります。
#! /usr/bin/env ruby

p 'Hello'
p 'Ruby'
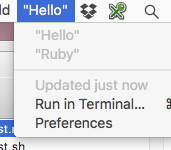
プラグインが複数ある場合は、それぞれ表示されます。

【Swift】SimpleTabでおしゃれなUITabBarControllerを実現する
SimpleTabというUITabBarControllerがオシャレになったようなライブラリを試してみました。

CocoaPodsでインストールします。
target 'MyApp' do
  use_frameworks!

  pod 'SimpleTab'
end
2017/10/3時点ではSwift4に対応していないので、Swift3で動かします。

まずはStoryboardだけで動かしてみます。
最初にタブバー用の適当な画像を追加します。

続けてStoryboard上にUITabBarControllerを設置してタブバーの画像やタイトルを設定します。
そしてUITabBarControllerのクラスをSimpleTabBarControllerにします。

続けて、UITabBarControllerのUITabBarのクラスをSimpleTabBarに変更します。

最後にUITabBarControllerに設置するUITabItemのクラスをSimpleTabBarItemに変更します。

以上で設定完了です。
アプリを起動すると、アニメーション付きのタブバーが表示されている事が分かります。

冒頭の弾むようなアニメーションは、SimpleTabBarControllerのtabBarStyleをPopTabBarStyleにする事で実現できます。
import UIKit
import SimpleTab

@UIApplicationMain
class AppDelegate: UIResponder, UIApplicationDelegate {
    var window: UIWindow?

    func application(_ application: UIApplication, didFinishLaunchingWithOptions launchOptions: [UIApplicationLaunchOptionsKey: Any]?) -> Bool {

        if let c = window?.rootViewController as? SimpleTabBarController {
            c.tabBarStyle = PopTabBarStyle(tabBar: c.tabBar)
        }

        return true
    }
}

タブバーのアイコンの色やテキストのフォントサイズは、tabBarStyleで変更できます。
if let c = window?.rootViewController as? SimpleTabBarController {
    c.tabBarStyle = PopTabBarStyle(tabBar: c.tabBar)
    c.tabBarStyle?.setIconColor(color: UIColor.green, forState: .selected)
}

アプリのAHA体験を考える
先日読んだ本で、ユーザーの継続率を上げる為にはAHA体験が重要という事を学んだので、自分のアプリのAHA体験は何かを考えてみました。

いちばんやさしいグロースハックの教本 人気講師が教える急成長マーケティング戦略 「いちばんやさしい教本」シリーズ
- 作者: 金山裕樹,梶谷健人
- 出版社/メーカー: インプレス
- 発売日: 2016/01/22
- メディア: Kindle版
- この商品を含むブログを見る
今回考えたのはこちらのアプリについてです。
アプリ内容
シンプルな体重管理アプリです。
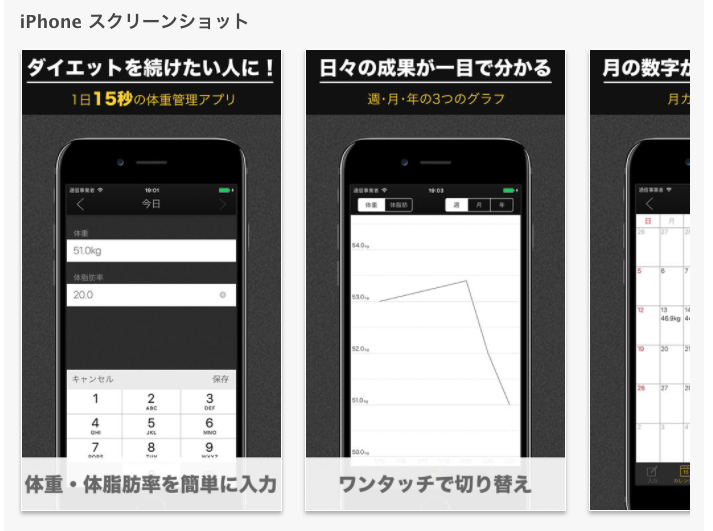
「体重・体脂肪率の入力」「体重・体脂肪率の推移をグラフ化」「体重・体脂肪率をカレンダー形式で表示」などの機能を備えています。
細かいところで言うと、目標設定、グラフの前期比表示、グラフへの目標設定などがあります。
ユーザーがこのアプリをインストールするモチベーション
体重管理をして痩せたい、もしくは適切な体重を維持したい。
その為に続けやすいアプリがほしい。
AHA体験候補
上記のモチベーションを考えると、AHA体験は下の物が候補になりそうだと思いました。
- グラフに目標や前期比を表示できるからモチベーションを維持しやすい
- 入力が簡単で使いやすい
AHA体験を促す施策
上で挙げたAHA体験を促す施策をそれぞれ考えてみました。
グラフに目標や前期比を表示できるからモチベーションを維持しやすい
- 初回起動時、グラフのビジュアルを表示する
- データが1件もない時、グラフ画面にはサンプルデータを表示する
- 目標は初期設定で入力できるようにする
入力が簡単で使いやすい
TabPageViewControllerでおしゃれなタブメニューを実現する
TabPageViewControllerというタブメニューを実現するライブラリを使ってみました。
このライブラリは有名なiQONで使われているということで、かなり期待できそうです。
UIPageViewControllerをつかって無限スクロールできるタブUIを実装してOSSとして公開しました - Start Today Technologies TECH BLOG
まずはCocoaPodsでインストールします。
target 'MyApp' do
  use_frameworks!

  pod 'TabPageViewController'
end
使い方は下のとおりです。
TabPageViewControllerのcreateメソッドで基本となるViewControllerを生成して、そこに色々加えていきます。
import UIKit
import TabPageViewController

class ViewController: UIViewController {
    override func viewDidAppear(_ animated: Bool) {

        let tabPageViewController = TabPageViewController.create()
        let vc1 = UIViewController()
        let vc2 = UIViewController()
        tabPageViewController.tabItems = [(vc1, "First"), (vc2, "Second")]

        present(tabPageViewController, animated: true, completion: nil)
    }
}
起動すると下のようにタブメニューが表示されます。

isInfinityを付けると無限にスクロールする事ができます。
import UIKit
import TabPageViewController

class ViewController: UIViewController {
    override func viewDidAppear(_ animated: Bool) {

        let tabPageViewController = TabPageViewController.create()
        let vc1 = UIViewController()
        let vc2 = UIViewController()
        tabPageViewController.tabItems = [(vc1, "First"), (vc2, "Second")]
        tabPageViewController.isInfinity = true

        present(tabPageViewController, animated: true, completion: nil)
    }
}
起動時の画面は下の通りです。

色やフォントサイズの情報は、TabPageViewControllerのoptionというプロパティーにセットします。
かなり細かくデザイン調整できそうです。
import UIKit
import TabPageViewController

class ViewController: UIViewController {
    override func viewDidAppear(_ animated: Bool) {

        let tabPageViewController = TabPageViewController.create()
        let vc1 = UIViewController()
        let vc2 = UIViewController()
        tabPageViewController.tabItems = [(vc1, "First"), (vc2, "Second")]
        tabPageViewController.option.fontSize = 14
        tabPageViewController.option.currentColor = .cyan
        tabPageViewController.option.currentColor = .darkGray
        tabPageViewController.option.tabHeight = 60.0
        tabPageViewController.option.tabMargin = 40.0
        tabPageViewController.option.tabWidth = 100
        tabPageViewController.option.currentBarHeight = 80
        tabPageViewController.option.tabBackgroundColor = .lightGray
        tabPageViewController.option.pageBackgoundColor = .gray
        tabPageViewController.option.isTranslucent = true
        tabPageViewController.option.hidesTabBarOnSwipe = true

        present(tabPageViewController, animated: true, completion: nil)
    }
}
それとTabPageViewControllerがUINavigationControllerにセットされている場合、updateNavigationBarHiddenメソッドを使う事ができます。
このメソッドを呼び出すと、ナビゲーションバーがアニメーション付きで隠れます。
import UIKit
import TabPageViewController

class ViewController: UIViewController {
    override func viewDidAppear(_ animated: Bool) {

        let tabPageViewController = TabPageViewController.create()
        let vc1 = UIViewController()
        let vc2 = UIViewController()
        tabPageViewController.tabItems = [(vc1, "First"), (vc2, "Second")]

        present(UINavigationController(rootViewController: tabPageViewController), animated: true, completion: {
            tabPageViewController.updateNavigationBarHidden(true, animated: true)
        })
    }
}
それから、displayControllerWithIndexを使うと任意のメニューを選ぶ事ができます。
import UIKit
import TabPageViewController

class ViewController: UIViewController {
    override func viewDidAppear(_ animated: Bool) {

        let tabPageViewController = TabPageViewController.create()
        let vc1 = UIViewController()
        let vc2 = UIViewController()
        tabPageViewController.tabItems = [(vc1, "First"), (vc2, "Second")]

        present(UINavigationController(rootViewController: tabPageViewController), animated: true, completion: {
            tabPageViewController.displayControllerWithIndex(1, direction: .reverse, animated: true)
        })
    }
}
【Swift】didSetの呼ばれるタイミング(初期化/Struct/Classなどで検証)
SwiftのdidSetの呼ばれるタイミングを調べてみました。
didSetとは
プロパティーの値セットを検知する仕組みです。
下のように書くことで、プロパティーに値がセットされたタイミングを検知する事ができます。
class MainClass {
    var value: Int? {
        didSet {
            print("didSet")
        }
    }
}
didSetの呼ばれるタイミング
下のようにプロパティーを変更するとdidSetが呼ばれます。
class MainClass {
    var value: Int? {
        didSet {
            print("didSet")
        }
    }
}

let c = MainClass()
c.value = 0 // → didSetが呼ばれる
初期値をセットする時は呼ばれません。
class MainClass {
    var value: Int? = 0 { // 初期値を入れても呼ばれない
        didSet {
            print("didSet")
        }
    }
}
同じ値を連続で入れた場合、2回didSetが呼ばれます。
class MainClass {
    var value: Int? {
        didSet {
            print("didSet")
        }
    }
}

let c = MainClass()
c.value = 0
c.value = 0 // didSetが2回呼ばれる
少し複雑ややこしいのですが、Structのプロパティーを変更した時も呼ばれます。
struct MyStruct {
    var value = 0
}

class MainClass {
    var myStruct = MyStruct() {
        didSet {
            print("didSet")
        }
    }
}

let c = MainClass()
c.myStruct.value = 0 // didSetが呼ばれる
classの場合はdidSetが呼ばれません。
class MyClass {
    var value = 0
}

class MainClass {
    var myClass = MyClass() {
        didSet {
            print("didSet")
        }
    }
}

let c = MainClass()
c.myClass.value = 0 // didSetは呼ばれない
UIStackViewでUIViewを均等配置
iOS9から登場したUIStackViewを試してみました。
UIStackViewでUIViewを均等配置
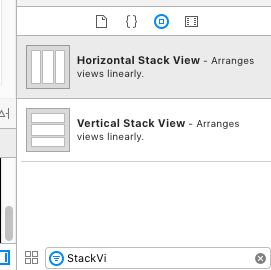
まずはUIStackViewを配置します。
縦方向と横方向があるのですが、今回は横方向に配置しました。
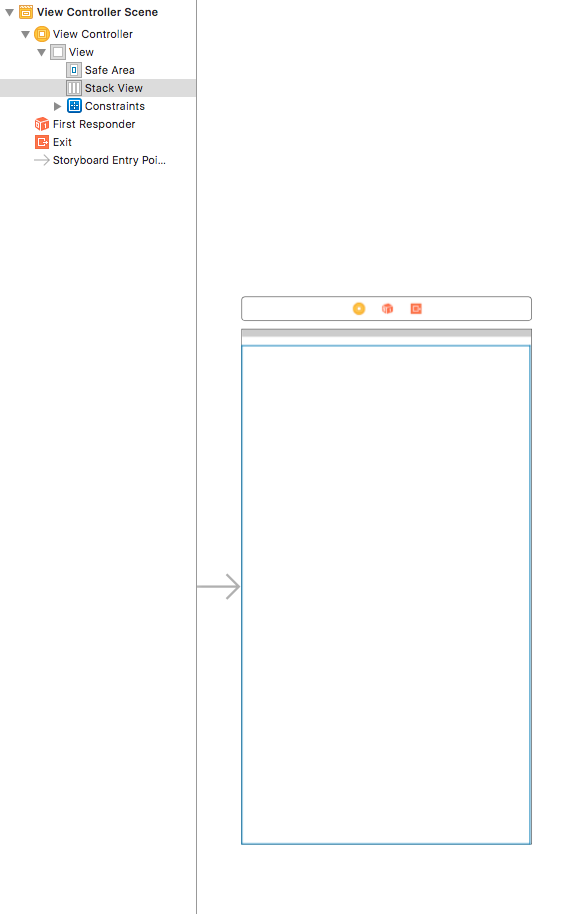
UIStackViewは下のように画面に配置しました。
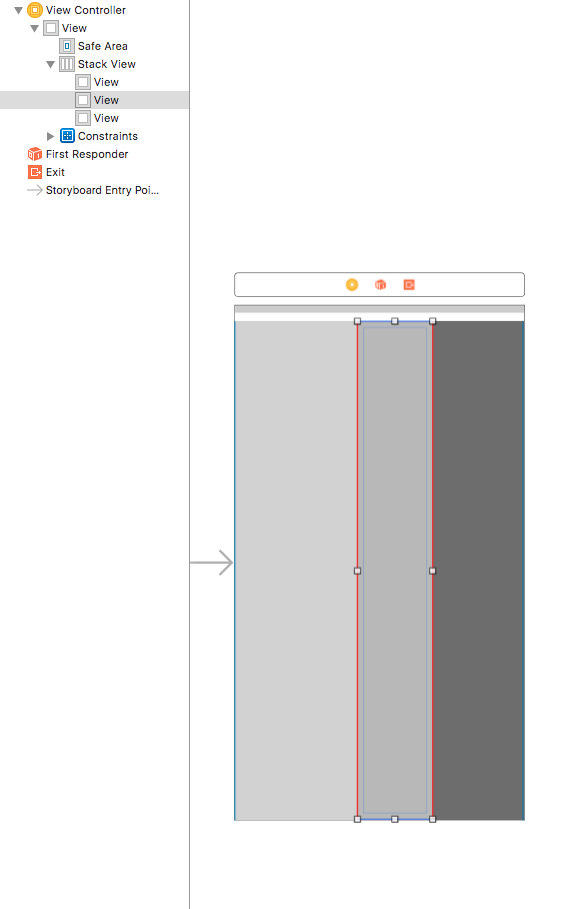
続けてUIViewを2つ配置します。
今回はこの3つを等幅・等間隔に並べてみます。
等間隔に並べるために、DistributionをFill Equallyにします。
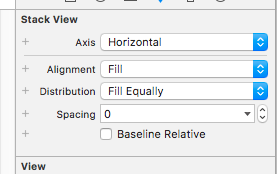
間隔の調整はSpacingで行います。
今回は間隔を30にしました。
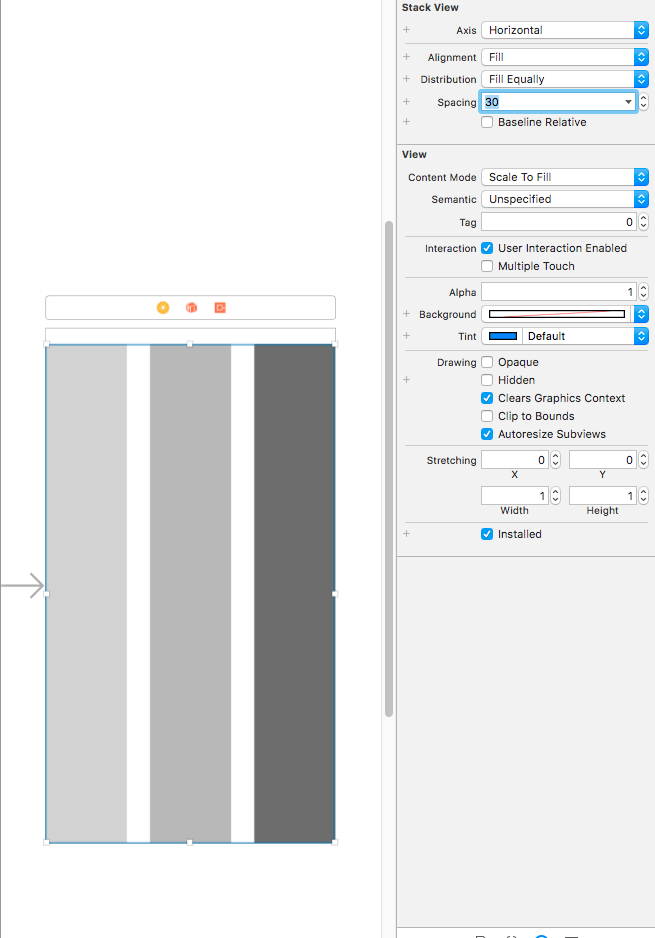
UIViewの縦の位置調整はAlignmentで行います。
下はTopを選択したので、上揃えになります。

LastBaseLineを選ぶと下のような配置になります。
