【GameplayKit】GKRuleSystemで複雑な条件を管理する
GKRuleSystemという複数の条件を管理する機能を使ってみました。
使い方は下の通りです。
- GKRuleSystemにGKRuleを追加する
- GKRuleSystemにパラメータをセットする
- GKRuleSystemの評価メソッド(evaluate)を呼ぶ
- 評価の結果を取得する
コードは下の通りです。
評価の結果は、GKRuleの引数のgradeの数字が返ってきます。
system.addがルールの追加、system.state["value1"] = 0がパラメータのセット、system.evaluate()が評価メソッドの呼び出し、system.grade(forFact: NSString(string: "fact1"))が結果の取得になります。
let system = GKRuleSystem()
system.add([
    GKRule(predicate: NSPredicate(format: "$value1 = 0"), assertingFact: NSString(string: "fact1"), grade: 0.9),
    ])
system.state["value1"] = 0
system.reset()
system.evaluate()
print(system.grade(forFact: NSString(string: "fact1"))) // → 0.9
条件式がfalseの場合、結果は0になります。
let system = GKRuleSystem()
system.add([
    GKRule(predicate: NSPredicate(format: "$value1 = 0"), assertingFact: NSString(string: "fact1"), grade: 0.9),
    ])
system.state["value1"] = 1 // → 今回は1をセット
system.reset()
system.evaluate()
print(system.grade(forFact: NSString(string: "fact1"))) // → 0.0
GKRuleは複数渡す事ができます。
複数の条件を満たす場合、結果は全ての条件の和になります。
let system = GKRuleSystem()
system.add([
    GKRule(predicate: NSPredicate(format: "$value1 = 0"), assertingFact: NSString(string: "fact1"), grade: 0.1),
    GKRule(predicate: NSPredicate(format: "$value2 = 1"), assertingFact: NSString(string: "fact1"), grade: 0.2),
    ])
system.state["value1"] = 0
system.state["value2"] = 1
system.reset()
system.evaluate()
print(system.grade(forFact: NSString(string: "fact1"))) // → 0.3
しかし結果は1.0以上にはならないので注意が必要です。
和が1.0以上の場合は、1.0が返ってきます。
let system = GKRuleSystem()
system.add([
    GKRule(predicate: NSPredicate(format: "$value1 = 0"), assertingFact: NSString(string: "fact1"), grade: 1.1),
    GKRule(predicate: NSPredicate(format: "$value2 = 1"), assertingFact: NSString(string: "fact1"), grade: 2.2),
    ])
system.state["value1"] = 0
system.state["value2"] = 1
system.reset()
system.evaluate()
print(system.grade(forFact: NSString(string: "fact1"))) // → 1.0
GKRuleの初期化のassertingFactをretractingFactに変えると、条件を満たした時にgradeを減算するようになります。
これも和の時と同じように0.0以下にはなりません。
let system = GKRuleSystem()
system.add([
    GKRule(predicate: NSPredicate(format: "$value1 = 0"), assertingFact: NSString(string: "fact1"), grade: 0.5),
    GKRule(predicate: NSPredicate(format: "$value2 = 1"), retractingFact: NSString(string: "fact1"), grade: 0.2),
    ])
system.state["value1"] = 0
system.state["value2"] = 1
system.reset()
system.evaluate()
print(system.grade(forFact: NSString(string: "fact1"))) // → 0.3
GKRuleはNSPredicateではなくブロックで評価をする事もできます。
GKRule(blockPredicate: { system in return true }, action: { system in print("条件を満たした") })
GKRuleのサブクラスを作って、そこに評価式を書くこともできます。
複雑な条件の時はこれを使うのも良さそうです。
class MyRule: GKRule {
    override func evaluatePredicate(in system: GKRuleSystem) -> Bool {
        return true
    }

    override func performAction(in system: GKRuleSystem) {
        print("条件を満たした")
    }
}
【Swift】ベジェ曲線を自前で描いてみる
ベジェ曲線って良く聞くんですが、イマイチ理解できてなかったので自前で描いてみました。
具体的にはベジェ曲線の座標を自分で計算して描画をしてみました。
ベジェ曲線の座標の求め方
ベジェ曲線の座標は制御点を使って求められます。
今回は下のように制御点が3つの場合のベジェ曲線を求めます。
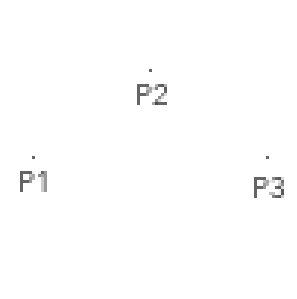
まずはP1とP2、P2とP3の2点間をつなぎます。

次にP1-P2間で少しだけP1から離れた点P4とP2-P3で少しだけP2から離れたP5を決めて、それらをつなぎます。

そしてP4-P5間で少しだけP4から離れた点P6がベジェ曲線の座標になります。

段々とP4・P5をP2・P3に近づけて行きつつ、それぞれのP6を算出します。


ここで算出したP6を全てつなげればベジェ曲線になります。
今回はこれをSwiftで実装してみようと思います。
ベジェ曲線をSwiftで描画
今回はこの3つの制御点を使ったベジェ曲線を求めます。

現状のコードは下の通りです。
import UIKit

class ViewController: UIViewController {
    override func viewDidLoad() {
        super.viewDidLoad()

        let myView = MyView(frame: view.bounds)
        myView.backgroundColor = UIColor.white
        view.addSubview(myView)
    }
}

class MyView: UIView {
    let point1 = CGPoint(x: 100, y: 200)
    let point2 = CGPoint(x: 200, y: 100)
    let point3 = CGPoint(x: 300, y: 200)

    override func draw(_ rect: CGRect) {
        UIColor.darkGray.setFill()
        UIBezierPath(roundedRect: CGRect(origin: point1, size: CGSize(width: 5, height: 5)), cornerRadius: 2).fill()
        UIBezierPath(roundedRect: CGRect(origin: point2, size: CGSize(width: 5, height: 5)), cornerRadius: 2).fill()
        UIBezierPath(roundedRect: CGRect(origin: point3, size: CGSize(width: 5, height: 5)), cornerRadius: 2).fill()
    }
}
先程描いたように、point1・point2・point3を元に、point6を求めてそれを繋いでいきます。
class MyView: UIView {
    let point1 = CGPoint(x: 100, y: 200)
    let point2 = CGPoint(x: 200, y: 100)
    let point3 = CGPoint(x: 300, y: 200)

    override func draw(_ rect: CGRect) {
        let count = 100
        let path = UIBezierPath()
        path.move(to: point1)
        (0...count).forEach {
            let point4 = CGPoint(
                x: point1.x + (point2.x - point1.x) * CGFloat($0) / CGFloat(count),
                y: point1.y + (point2.y - point1.y) * CGFloat($0) / CGFloat(count)
            )
            let point5 = CGPoint(
                x: point2.x + (point3.x - point2.x) * CGFloat($0) / CGFloat(count),
                y: point2.y + (point3.y - point2.y) * CGFloat($0) / CGFloat(count)
            )
            let point6 = CGPoint(
                x: point4.x + (point5.x - point4.x) * CGFloat($0) / CGFloat(count),
                y: point4.y + (point5.y - point4.y) * CGFloat($0) / CGFloat(count)
            )
            path.addLine(to: point6)
        }
        path.addLine(to: point3)
        path.lineWidth = 5.0
        UIColor.brown.setStroke()
        path.stroke()
    }
}
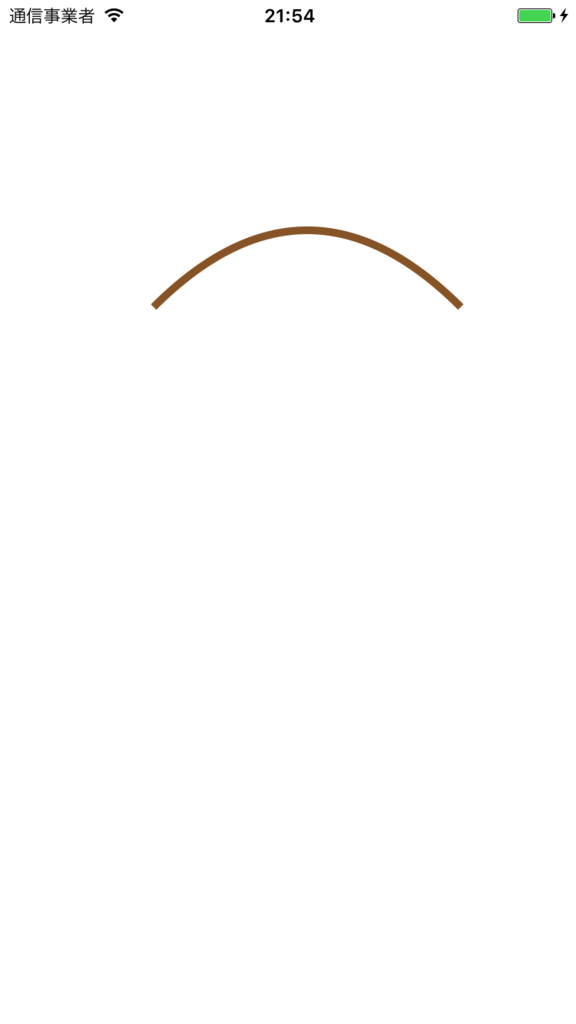
これを実行すると以下のようになります。
無事にきれいな曲線を引くことができました。
【Swift3】UIViewのdrawの中で線や文字や画像を描画する
UIViewのdrawメソッド中では線・文字・矩形など様々なものを描画できます。
今回はそれらの描画を試してみました。
検証用コードは下の通りです。
import UIKit

class ViewController: UIViewController {
    override func viewDidLoad() {
        super.viewDidLoad()

        let myView = MyView(frame: view.bounds)
        myView.backgroundColor = UIColor.white
        view.addSubview(myView)
    }
}

class MyView: UIView {
    override func draw(_ rect: CGRect) {
    }
}
線を引く
線の描画は以下の通りです。
線の太さや色を変える事ができます。
class MyView: UIView {
    override func draw(_ rect: CGRect) {
        let path = UIBezierPath()
        path.move(to: CGPoint(x: 100, y: 100))
        path.addLine(to: CGPoint(x: 200, y: 200))
        path.lineWidth = 5.0 // 線の太さ
        UIColor.brown.setStroke() // 色をセット
        path.stroke()
    }
}
実行結果は以下の通りです。

addLineを追加すれば複雑な線も作る事ができます。
class MyView: UIView {
    override func draw(_ rect: CGRect) {
        let path = UIBezierPath()
        path.move(to: CGPoint(x: 100, y: 100))
        path.addLine(to: CGPoint(x: 200, y: 200))
        path.addLine(to: CGPoint(x: 300, y: 100)) // 今回追加
        path.lineWidth = 5.0 // 線の太さ
        UIColor.brown.setStroke() // 色をセット
        path.stroke()
    }
}

曲線を描画する
addCurveメソッドを使う事でベジェ曲線を描画する事ができます。
class MyView: UIView {
    override func draw(_ rect: CGRect) {
        let path = UIBezierPath()
        path.move(to: CGPoint(x: 100, y: 100))
        path.addCurve(to: CGPoint(x: 200, y: 200), controlPoint1: CGPoint(x: 150, y: 100), controlPoint2: CGPoint(x: 200, y: 150))
        path.lineWidth = 5.0 // 線の太さ
        UIColor.brown.setStroke() // 色をセット
        path.stroke()
    }
}

曲線の描画はaddArcでも行う事ができます。
class MyView: UIView {
    override func draw(_ rect: CGRect) {
        let path = UIBezierPath()
        path.move(to: CGPoint(x: 100, y: 100))
        path.addArc(withCenter: CGPoint(x: 200, y: 100), radius: 100, startAngle: 180 * CGFloat.pi/180, endAngle: 90 * CGFloat.pi/180, clockwise: false)
        path.lineWidth = 5.0 // 線の太さ
        UIColor.brown.setStroke() // 色をセット
        path.stroke()
    }
}

四角形の描画
四角形の描画は以下のように行います。
class MyView: UIView {
    override func draw(_ rect: CGRect) {
        let path = UIBezierPath(roundedRect: CGRect(x: 100, y: 100, width: 100, height: 100), cornerRadius: 10)
        UIColor.darkGray.setFill() // 色をセット
        path.fill()
    }
}

addLineを使って描画する事もできます。
class MyView: UIView {
    override func draw(_ rect: CGRect) {
        let path = UIBezierPath()
        path.move(to: CGPoint(x: 100, y: 100))
        path.addLine(to: CGPoint(x: 200, y: 100))
        path.addLine(to: CGPoint(x: 200, y: 200))
        path.addLine(to: CGPoint(x: 100, y: 200))
        path.addLine(to: CGPoint(x: 100, y: 100))
        UIColor.darkGray.setFill() // 色をセット
        path.fill()
    }
}
文字の描画
文字の描画は以下のように行います。
第2引数でフォントや文字色の指定もできます。
class MyView: UIView {
    override func draw(_ rect: CGRect) {
        "MyText".draw(at: CGPoint(x: 100, y: 100), withAttributes: [
            NSForegroundColorAttributeName : UIColor.blue,
            NSFontAttributeName : UIFont.systemFont(ofSize: 50),
            ])
    }
}

画像の描画
画像もテキスト同様にdrawメソッドを使います。
class MyView: UIView {
    override func draw(_ rect: CGRect) {
        UIImage(named: "sample")?.draw(at: CGPoint(x: 100, y: 100))
    }
}

WKWebViewのキャッシュなどをクリアする
個人で出しているブラウザアプリの容量がかなりの大きさになっていたので調査しました。
キャッシュ等の削除方法は下の通りです。
これでアプリ容量が500MB → 60MBまで減りました。
WKWebsiteDataStore.default().removeData(ofTypes: WKWebsiteDataStore.allWebsiteDataTypes(), modifiedSince: Date(timeIntervalSince1970: 0), completionHandler: {})
「キャッシュ・cookieだけ」のように削除対象を絞りたい場合は第一引数に削除したい対象をセットします。
WKWebsiteDataStore.default().removeData(ofTypes: [WKWebsiteDataTypeDiskCache], modifiedSince: Date(timeIntervalSince1970: 0), completionHandler: {})
キーとして使えるものは以下の通りです。
public let WKWebsiteDataTypeDiskCache: String
public let WKWebsiteDataTypeMemoryCache: String
public let WKWebsiteDataTypeOfflineWebApplicationCache: String
public let WKWebsiteDataTypeCookies: String
public let WKWebsiteDataTypeSessionStorage: String
public let WKWebsiteDataTypeLocalStorage: String
public let WKWebsiteDataTypeWebSQLDatabases: String
public let WKWebsiteDataTypeIndexedDBDatabases: String
【iOS】AdMobネイティブ広告を試してみる
2017/10/17追記
*ネイティブ エクスプレス広告ですが、2018年3月に廃止予定とのアナウンスがありました。

はじめに
AdMobでネイティブ エクスプレス広告というものを試してみました。
広告ユニットの作成
広告ユニット作成は、バナー広告同様にAdMobの管理画面から行います。
右端に"ネイティブ"というものがあるので、それを選択して作成します。

Startボタンを押すと、広告サイズ選択画面に移動します。
今回は"小"を選択しました。

サイズを選択すると、テンプレート選択画面に移動します。

中と大のテンプレートは下の通りです。


最後にデザインをカスタマイズします。

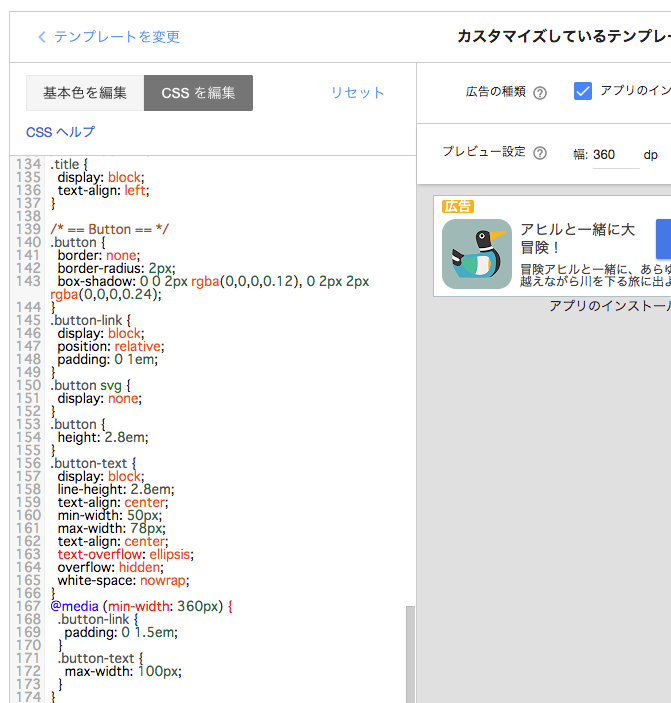
デザインはCSSを使ってカスタマイズする事もできます。
広告の実装
まずはAdMobをCocoaPodsでインストールします。
platform :ios, '9.0'

target 'Rss' do
  use_frameworks!

  pod 'Firebase/Core'
  pod 'Firebase/AdMob'
end
次はStoryboardに広告を追加します。
ビューを追加して、クラスをGADNativeExpressAdViewに設定します。

最後にViewControllerに広告読み込み処理を追加すれば完了です。
class ViewController: UIViewController {
    @IBOutlet weak var adView: GADNativeExpressAdView!

    override func viewDidLoad() {
        super.viewDidLoad()

        adView.adUnitID = "自分のAdUnitID"
        adView.rootViewController = self
        adView.load(GADRequest())
        adView.delegate = self
        adView.backgroundColor = UIColor.blue
   }
}

Error: No ad to showエラーが出る場合
GADNativeExpressAdViewビューのサイズが適切でないとError: No ad to showエラーになります。
広告の推奨サイズは以下の通りです。

【iOS10】ローカル通知に画像を添付する | User Notifications framework
User Notifications frameworkではローカル通知に画像を添付できるようなので試してみました。
画像なしの通知を送る
まずは下記事を参考に通常の画像なしのローカル通知を送ってみます。
実装は下の通りです。
import UIKit
import UserNotifications

@UIApplicationMain
class AppDelegate: UIResponder, UIApplicationDelegate {
    var window: UIWindow?

    func application(_ application: UIApplication, didFinishLaunchingWithOptions launchOptions: [UIApplicationLaunchOptionsKey: Any]?) -> Bool {
        UNUserNotificationCenter.current().requestAuthorization(options: [.badge, .alert, .sound], completionHandler: { result, error in
        })

        return true
    }

    func applicationDidEnterBackground(_ application: UIApplication) {
        let content = UNMutableNotificationContent()
        content.title = "たいとる"
        content.subtitle = "さぶたいとる"
        content.body = "ほんぶん"
        content.badge = NSNumber(value: 1)
        content.sound = UNNotificationSound.default()
        let trigger = UNTimeIntervalNotificationTrigger(timeInterval: 10, repeats: false)
        let request = UNNotificationRequest(identifier: "Identifier", content: content, trigger: trigger)
        let center = UNUserNotificationCenter.current()
        center.add(request)
    }
}
アプリ起動&バックグラウンドに移動で下のように通知が送られます。

画像付き通知を送る
次は画像付きの通知を送ります。
まずはプロジェクトに画像を追加します。

次にローカル通知に画像を設定します。
通知を送る処理を下のように修正します。
@UIApplicationMain
class AppDelegate: UIResponder, UIApplicationDelegate {
    func applicationDidEnterBackground(_ application: UIApplication) {
        let content = UNMutableNotificationContent()
        content.title = "たいとる"
        content.body = "ほんぶん"

        if let path = Bundle.main.path(forResource: "image", ofType: "png") {
            content.attachments = [try! UNNotificationAttachment(identifier: "ID1", url: URL(fileURLWithPath: path), options: nil)]
        }

        let trigger = UNTimeIntervalNotificationTrigger(timeInterval: 10, repeats: false)
        let request = UNNotificationRequest(identifier: "Identifier", content: content, trigger: trigger)
        let center = UNUserNotificationCenter.current()
        center.add(request)
    }
}
今回追加した下の部分が画像の付与処理になります。
UNMutableNotificationContentのattachmentsプロパティーに渡す事で画像を表示しています。
if let path = Bundle.main.path(forResource: "image", ofType: "png") {
    content.attachments = [try! UNNotificationAttachment(identifier: "ID1", url: URL(fileURLWithPath: path), options: nil)]
}
この状態でアプリ起動&バックグラウンドに移動をすると下のように画像付き通知が送信されます。

UNNotificationAttachmentには動画を指定することもできます。
if let path = Bundle.main.path(forResource: "movie", ofType: "mov") {
    content.attachments = [try! UNNotificationAttachment(identifier: "ID1", url: URL(fileURLWithPath: path), options: nil)]
}
動画は事前にプロジェクトに追加したものを使います。

この状態で通知を開くとしたのように動画を見ることができます。

画像・動画だけでなくサウンドも添付する事ができます。
if let path = Bundle.main.path(forResource: "sound", ofType: "wav") {
    content.attachments = [try! UNNotificationAttachment(identifier: "ID1", url: URL(fileURLWithPath: path), options: nil)]
}
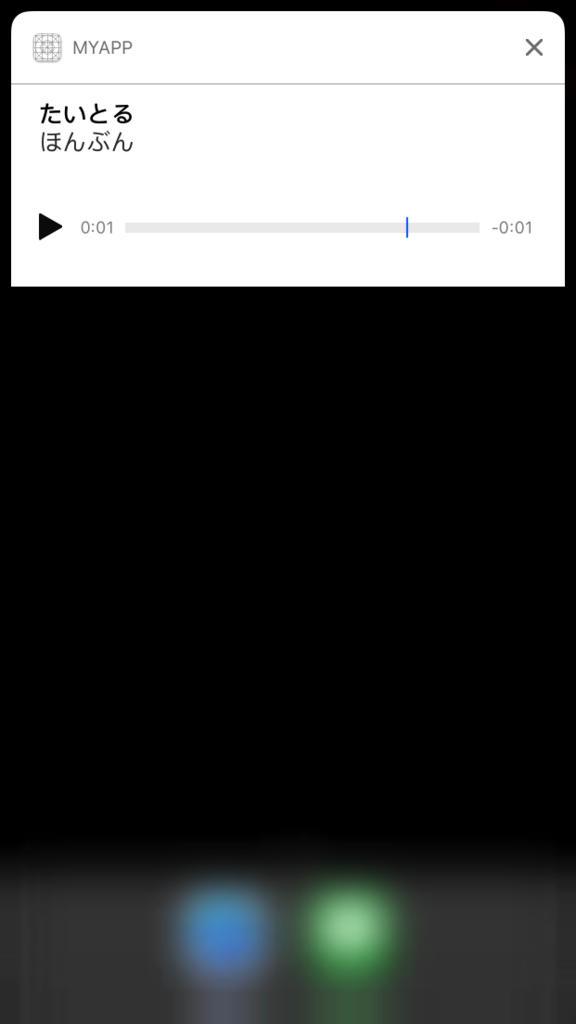
表示は下の通りです。
SFSafariViewControllerとSafariがcookieを共有しているかの調査
2017/8/18追記
iOS11では、SFSafariViewControllerとSafariのcookieの共有ができなくなりました。
SFSafariViewControllerとSafariがcookieを共有しているかの調査
SFSafariViewControllerはiPhoneのSafariとのcookieを共有しているかどうか調査してみました。
SafariでセットしたcookieをSFSafariViewControllerで取得できるか
SafariでTwitterでログイン。
その後SFSafariViewControllerを見るとどうなってるかを調べました。
SFSafariViewControllerの表示は下のように実装しました。
import UIKit
import SafariServices

class ViewController: UIViewController {
    override func viewDidAppear(_ animated: Bool) {
        super.viewDidAppear(animated)

        let c = SFSafariViewController(url: URL(string: "https://twitter.com")!)
        present(c, animated: true, completion: nil)
    }
}

下が、その状態でSFSafariViewControllerでTwitterを見た時の表示です。
無事にログイン状態になっている(cookieが共有されている)ことが確認できました。

SFSafariViewControllerでセットしたcookieをSafariで取得できるか
今度はSFSafariViewControllerでログインしてSafariに移動してみます。
一度ログアウトして、SFSafariViewController上でTwitterにログインします。
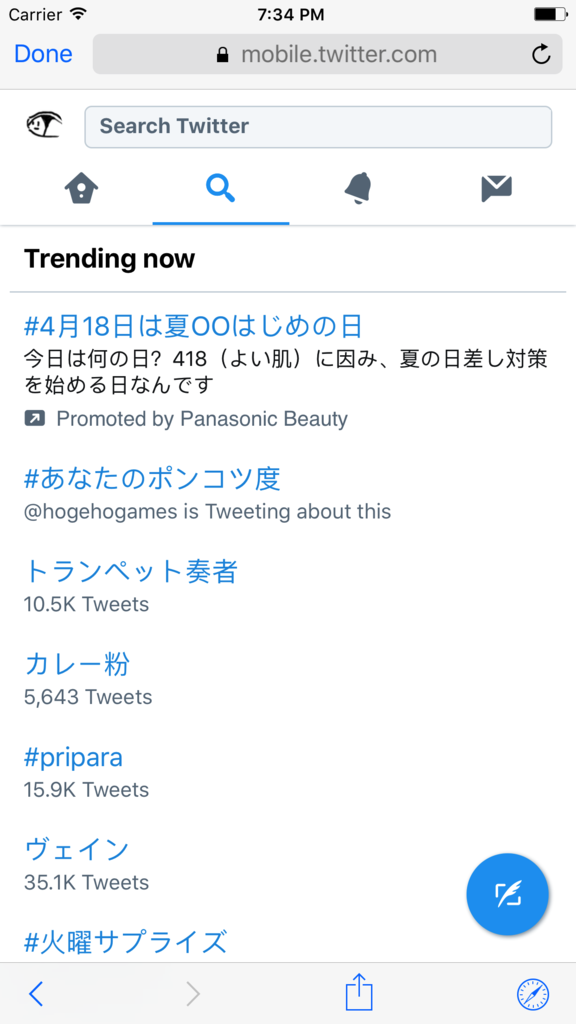
この状態でSafariでTwitterを見てもログイン状態になっていました。
SFSafariViewController → Safariへもcookieは引き継がれるようです。

WKWebViewではcookieを引き継ぐか
最後にSafariとWKWebViewではcookieの共有されるか確認してみました。
実装は下の通りです。
import UIKit
import WebKit

class ViewController: UIViewController {
    override func viewDidAppear(_ animated: Bool) {
        super.viewDidAppear(animated)

        let v = WKWebView(frame: view.bounds)
        view.addSubview(v)
        v.load(URLRequest(url: URL(string: "https://twitter.com")!))
    }
}
SFSafariViewController同様にSafariでログイン → WKWebViewで表示としたのですがログイン状態にはなっていませんでした。(cookieは引き継がれず)

まとめ
Safari ⇔ SFSafariViewControllerではcookieが共有される。
Safari ⇔ WKWebViewではcookieが共有されない。