しめ鯖日記

swift, iPhoneアプリ開発, ruby on rails等のTipsや入門記事書いてます

【iOS10】ローカル通知に画像を添付する | User Notifications framework

User Notifications frameworkではローカル通知に画像を添付できるようなので試してみました。

画像なしの通知を送る

まずは下記事を参考に通常の画像なしのローカル通知を送ってみます。

www.cl9.info

実装は下の通りです。

import UIKit
import UserNotifications

@UIApplicationMain
class AppDelegate: UIResponder, UIApplicationDelegate {
    var window: UIWindow?
    
    func application(_ application: UIApplication, didFinishLaunchingWithOptions launchOptions: [UIApplicationLaunchOptionsKey: Any]?) -> Bool {
        UNUserNotificationCenter.current().requestAuthorization(options: [.badge, .alert, .sound], completionHandler: { result, error in
        })
        
        return true
    }
    
    func applicationDidEnterBackground(_ application: UIApplication) {
        let content = UNMutableNotificationContent()
        content.title = "たいとる"
        content.subtitle = "さぶたいとる"
        content.body = "ほんぶん"
        content.badge = NSNumber(value: 1)
        content.sound = UNNotificationSound.default()
        let trigger = UNTimeIntervalNotificationTrigger(timeInterval: 10, repeats: false)
        let request = UNNotificationRequest(identifier: "Identifier", content: content, trigger: trigger)
        let center = UNUserNotificationCenter.current()
        center.add(request)
    }
}

アプリ起動&バックグラウンドに移動で下のように通知が送られます。

f:id:llcc:20170418202058p:plain

画像付き通知を送る

次は画像付きの通知を送ります。
まずはプロジェクトに画像を追加します。

f:id:llcc:20170418204328p:plain

次にローカル通知に画像を設定します。
通知を送る処理を下のように修正します。

@UIApplicationMain
class AppDelegate: UIResponder, UIApplicationDelegate {
    func applicationDidEnterBackground(_ application: UIApplication) {
        let content = UNMutableNotificationContent()
        content.title = "たいとる"
        content.body = "ほんぶん"
        
        if let path = Bundle.main.path(forResource: "image", ofType: "png") {
            content.attachments = [try! UNNotificationAttachment(identifier: "ID1", url: URL(fileURLWithPath: path), options: nil)]
        }
        
        let trigger = UNTimeIntervalNotificationTrigger(timeInterval: 10, repeats: false)
        let request = UNNotificationRequest(identifier: "Identifier", content: content, trigger: trigger)
        let center = UNUserNotificationCenter.current()
        center.add(request)
    }
}

今回追加した下の部分が画像の付与処理になります。
UNMutableNotificationContentのattachmentsプロパティーに渡す事で画像を表示しています。

if let path = Bundle.main.path(forResource: "image", ofType: "png") {
    content.attachments = [try! UNNotificationAttachment(identifier: "ID1", url: URL(fileURLWithPath: path), options: nil)]
}

この状態でアプリ起動&バックグラウンドに移動をすると下のように画像付き通知が送信されます。

f:id:llcc:20170418204659p:plain

UNNotificationAttachmentには動画を指定することもできます。

if let path = Bundle.main.path(forResource: "movie", ofType: "mov") {
    content.attachments = [try! UNNotificationAttachment(identifier: "ID1", url: URL(fileURLWithPath: path), options: nil)]
}

動画は事前にプロジェクトに追加したものを使います。

f:id:llcc:20170418205615p:plain

この状態で通知を開くとしたのように動画を見ることができます。

f:id:llcc:20170418205529p:plain

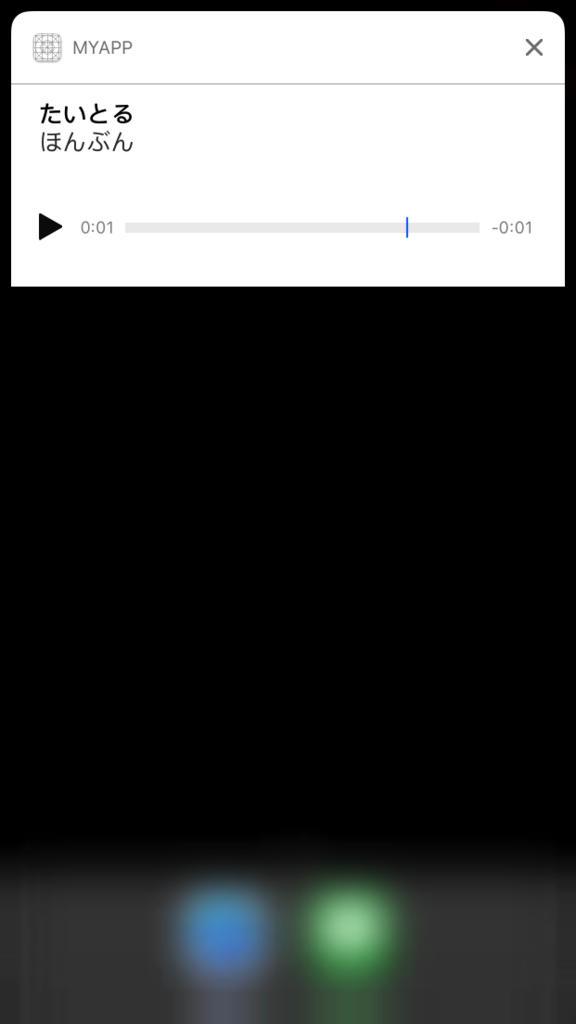
画像・動画だけでなくサウンドも添付する事ができます。

if let path = Bundle.main.path(forResource: "sound", ofType: "wav") {
    content.attachments = [try! UNNotificationAttachment(identifier: "ID1", url: URL(fileURLWithPath: path), options: nil)]
}

表示は下の通りです。
f:id:llcc:20170418205845p:plain

SFSafariViewControllerとSafariがcookieを共有しているかの調査

2017/8/18追記

iOS11では、SFSafariViewControllerとSafaricookieの共有ができなくなりました。

SFSafariViewControllerとSafaricookieを共有しているかの調査

SFSafariViewControllerはiPhoneSafariとのcookieを共有しているかどうか調査してみました。

SafariでセットしたcookieをSFSafariViewControllerで取得できるか

SafariTwitterでログイン。
その後SFSafariViewControllerを見るとどうなってるかを調べました。

SFSafariViewControllerの表示は下のように実装しました。

import UIKit
import SafariServices

class ViewController: UIViewController {
    override func viewDidAppear(_ animated: Bool) {
        super.viewDidAppear(animated)
        
        let c = SFSafariViewController(url: URL(string: "https://twitter.com")!)
        present(c, animated: true, completion: nil)
    }
}

まずはSafariTwitterにログインします。

f:id:llcc:20170418193112p:plain

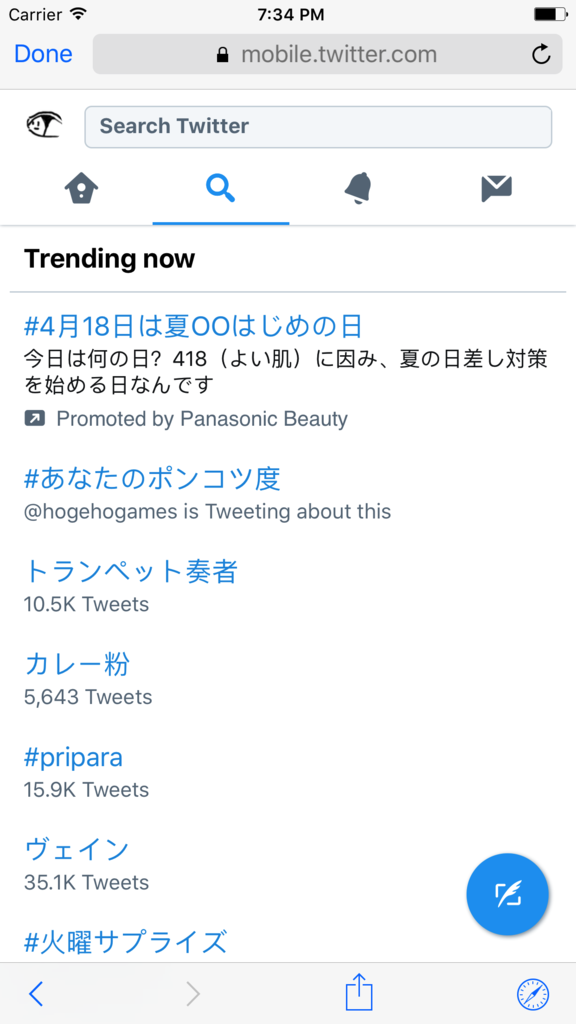
下が、その状態でSFSafariViewControllerでTwitterを見た時の表示です。
無事にログイン状態になっている(cookieが共有されている)ことが確認できました。

f:id:llcc:20170418193203p:plain

SFSafariViewControllerでセットしたcookieSafariで取得できるか

今度はSFSafariViewControllerでログインしてSafariに移動してみます。
一度ログアウトして、SFSafariViewController上でTwitterにログインします。

f:id:llcc:20170418193412p:plain

この状態でSafariTwitterを見てもログイン状態になっていました。
SFSafariViewController → Safariへもcookieは引き継がれるようです。

f:id:llcc:20170418193459p:plain

WKWebViewではcookieを引き継ぐか

最後にSafariとWKWebViewではcookieの共有されるか確認してみました。
実装は下の通りです。

import UIKit
import WebKit

class ViewController: UIViewController {
    override func viewDidAppear(_ animated: Bool) {
        super.viewDidAppear(animated)
        
        let v = WKWebView(frame: view.bounds)
        view.addSubview(v)
        v.load(URLRequest(url: URL(string: "https://twitter.com")!))
    }
}

SFSafariViewController同様にSafariでログイン → WKWebViewで表示としたのですがログイン状態にはなっていませんでした。(cookieは引き継がれず)

f:id:llcc:20170418194947p:plain

まとめ

Safari ⇔ SFSafariViewControllerではcookieが共有される。
Safari ⇔ WKWebViewではcookieが共有されない。

フォルダ以下の全プロジェクトでgit pullする

下のように、フォルダ以下に複数プロジェクトがありそれらでgit pullしたい時のtipsです。

f:id:llcc:20170407204122p:plain

コマンドは下の通りです。

ls | xargs -I{} git -C {} pull origin master

xargs -I{}lsの結果を{}と書いた箇所で使えます。
git -Cはフォルダ指定でgitコマンドを実行するので、フォルダ名({})を渡す事で各プロジェクトのgit pullを実行しています。

iPhoneアプリにストリートビューを表示する

GoogleMapsSDKを使ってアプリ上にストリートビューを表示してみました。

準備

最初にGoogleAPIManagerでAPIキーを作成します。
まずは下サイトでGoogle Maps SDK for iOSを有効化します。

console.developers.google.com

次は下ページでAPIキーを作成します。
「認証情報を作成」ボタンでAPIキーを選択します。

console.developers.google.com

f:id:llcc:20170406200818p:plain

実装

次は今作ったキーを元にストリートビューを表示します。

最初にCocoaPodsでGoogleMapsライブラリをインストールします。

target 'MyApp' do
  use_frameworks!

  pod 'GoogleMaps'
end

ライブラリをインストールしたらAPIキーのセットを行います。
AppDelegateを以下のように修正します。

import UIKit
import GoogleMaps

@UIApplicationMain
class AppDelegate: UIResponder, UIApplicationDelegate {
    var window: UIWindow?

    func application(_ application: UIApplication, didFinishLaunchingWithOptions launchOptions: [UIApplicationLaunchOptionsKey: Any]?) -> Bool {
        
        GMSServices.provideAPIKey("API_KEY")
        
        return true
    }
}

最後にストリートビューの貼り付けを行います。
ViewControllerを以下のように修正します。

import UIKit
import GoogleMaps

class ViewController: UIViewController {
    override func viewDidLoad() {
        super.viewDidLoad()
        
        let panoView = GMSPanoramaView(frame: view.bounds)
        view.addSubview(panoView)
        
        panoView.moveNearCoordinate(CLLocationCoordinate2D(latitude: -33.732, longitude:150.312))
    }
}

これで画面にストリートビューを表示する事ができました。

f:id:llcc:20170406201337p:plain

ビューには様々なオプションがあります。

let panoView = GMSPanoramaView(frame: view.bounds)
view.addSubview(panoView)

panoView.orientationGestures = false // スワイプで方向転換
panoView.zoomGestures = false // ピンチで拡大・縮小
panoView.navigationGestures = false // 矢印タップで移動
panoView.navigationLinksHidden = true // 矢印を非表示

panoView.moveNearCoordinate(CLLocationCoordinate2D(latitude: -33.732, longitude:150.312))

ビューにはDelegateも設定する事ができます。

extension ViewController: GMSPanoramaViewDelegate {
    func panoramaView(_ view: GMSPanoramaView, willMoveToPanoramaID panoramaID: String) {}
    func panoramaView(_ view: GMSPanoramaView, didMoveTo panorama: GMSPanorama?) {}
    func panoramaView(_ view: GMSPanoramaView, didMoveTo panorama: GMSPanorama, nearCoordinate coordinate: CLLocationCoordinate2D) {}
    func panoramaView(_ view: GMSPanoramaView, error: Error, onMoveNearCoordinate coordinate: CLLocationCoordinate2D) {}
    func panoramaView(_ view: GMSPanoramaView, error: Error, onMoveToPanoramaID panoramaID: String) {}
    func panoramaView(_ panoramaView: GMSPanoramaView, didMove camera: GMSPanoramaCamera) {}
    func panoramaView(_ panoramaView: GMSPanoramaView, didTap point: CGPoint) {}
    func panoramaView(_ panoramaView: GMSPanoramaView, didTap marker: GMSMarker) -> Bool { return true }
    func panoramaViewDidStartRendering(_ panoramaView: GMSPanoramaView) {}
    func panoramaViewDidFinishRendering(_ panoramaView: GMSPanoramaView) {}
}

Processingで電子アート入門

Processingという電子アート用の開発環境を試してみました。

Processing.org

インストール

下からアプリをダウンロードします。

Download \ Processing.org

実装

円を描画

Processingを起動すると以下のような画面になっています。
ここにコードを書いていきます。

f:id:llcc:20170403222211p:plain

Processingでは主に下の2メソッドに処理を書いていきます。
setupは最初に一度だけ呼ばれるメソッド、drawは毎秒呼ばれるメソッドです。

void setup() {
}

void draw() {
}

円の描画はellipseメソッドを使います。
第一引数、第二引数は中心のxyで第三引数と第四引数は横幅と縦幅になります。

void setup() {
  ellipse(50, 50, 40, 40);
}

実行すると以下のように円が表示されます。

f:id:llcc:20170403222801p:plain

背景色を変える場合はfillメソッドを使います。

void setup() {
  fill(51, 51, 204);
  ellipse(50, 50, 40, 40);
}

f:id:llcc:20170403223656p:plain

線を引く

線を引くにはLineメソッドを使います。
最初の2つの引数が始点の座標、次の2つが終点の座標です。

void setup() {
  line(10, 30, 90, 70);
}

f:id:llcc:20170403223906p:plain

線の色はstrokeメソッドで変更します。

void setup() {
  stroke(51, 51, 204);
  line(10, 30, 90, 70);
}

文字を表示する

文字の表示はtextメソッドを使います。

void setup() {
  text("Hello!!", 50, 50);
}

f:id:llcc:20170403224100p:plain

クリックイベントを取得する

クリックしているかどうかはmousePressedを使えば取得できます。
drawは毎秒呼ばれるので、ここでmousePressedを使った判定式を書けばクリック時に処理させる事ができます。

void draw() {
  if (mousePressed)
    ellipse(50, 50, 40, 40);
}

参考URL

プログラミング初心者でも大丈夫!Processingでデジタルアートを作ろう | 株式会社LIG

【ios】FirebaseAnalyticsのイベント送信を試してみる

Firebaseでイベントを送る方法を調べてみました。
GoogleAnalyticsの下処理に相当するものです。

let tracker = GAI.sharedInstance().defaultTracker
tracker?.send(GAIDictionaryBuilder.createEvent(withCategory: "category", action: "action", label: "label", value: NSNumber(value: 1)).build() as? [AnyHashable: Any])

まずは下URLを参考にFirebaseAnalyticsの設定を行います。

www.cl9.info

イベント送信は下のようにlogEventで行います。

Analytics.logEvent("ログ1", parameters: [AnalyticsEventTutorialBegin: "Value" as NSObject])

FirebaseAnalyticsの画面には以下のように表示されます。

f:id:llcc:20170403195453p:plain

ユーザープロパティーという、GoogleAnalyticsのカスタムディメンションのような機能もあります。

f:id:llcc:20170323204353p:plain

ユーザープロパティーのセットは下のように行います。

Analytics.setUserProperty("テスト1", forName: "testProperty")
Analytics.logEvent("ログ1", parameters: [AnalyticsEventTutorialBegin: "Value" as NSObject])

これを使えばイベントをフィルタリングする事ができます。

f:id:llcc:20170403200541p:plain

【UIRefreshControl】UITableViewを下に引っ張ってリロード

UITableViewに下に引っ張るどリロードする実装を試してみました。
こちらはUIRefreshControlというクラスを使います。

UITableViewへのリロード処理の追加

実装は非常に簡単で、UIRefreshControlをUITableViewにaddSubviewするだけです。

class ViewController: UIViewController {
    @IBOutlet weak var tableView: UITableView!
    
    override func viewDidLoad() {
        super.viewDidLoad()
        
        let refreshControl = UIRefreshControl()
        tableView.addSubview(refreshControl)
    }
}

これを実装して下に引っ張ると下のようにローディング表示されます。

f:id:llcc:20170402195402p:plain

下に引っ張った時のコールバックメソッドはvalueChangedイベントを使って設定します。

class ViewController: UIViewController {
    @IBOutlet weak var tableView: UITableView!
    
    override func viewDidLoad() {
        super.viewDidLoad()
        
        let refreshControl = UIRefreshControl()
        refreshControl.addTarget(self, action: #selector(ViewController.refreshControlValueChanged(sender:)), for: .valueChanged)
        tableView.addSubview(refreshControl)
    }
    
    func refreshControlValueChanged(sender: UIRefreshControl) {
        print("テーブルを下に引っ張った時に呼ばれる")
    }
}

処理が終わったら、UIRefreshControlのendRefreshingメソッドを呼んでインジケータを非表示にします。

func refreshControlValueChanged(sender: UIRefreshControl) {
    DispatchQueue.main.asyncAfter(deadline: .now() + 1, execute: {
        sender.endRefreshing()
    })
}

UIRefreshControlのカスタマイズ

UIRefreshControlはインジケータの色変更とテキスト追加ができます。

let refreshControl = UIRefreshControl()
refreshControl.tintColor = UIColor.blue
refreshControl.attributedTitle = NSAttributedString(string: "てきすと")

表示は下の通りです。

f:id:llcc:20170402200048p:plain